Tomatoville® Gardening Forums


Notices

Have a favorite recipe that's always a hit with family and friends? Share it with us!

Reply
 
Thread Tools Display Modes
Old September 4, 2019   #31
SQWIBB
Tomatovillian™
 
Join Date: Jan 2018
Location: Philly 7A
Posts: 739
Default

I usually do my pulled pork on the pit.


October 27th, 2013
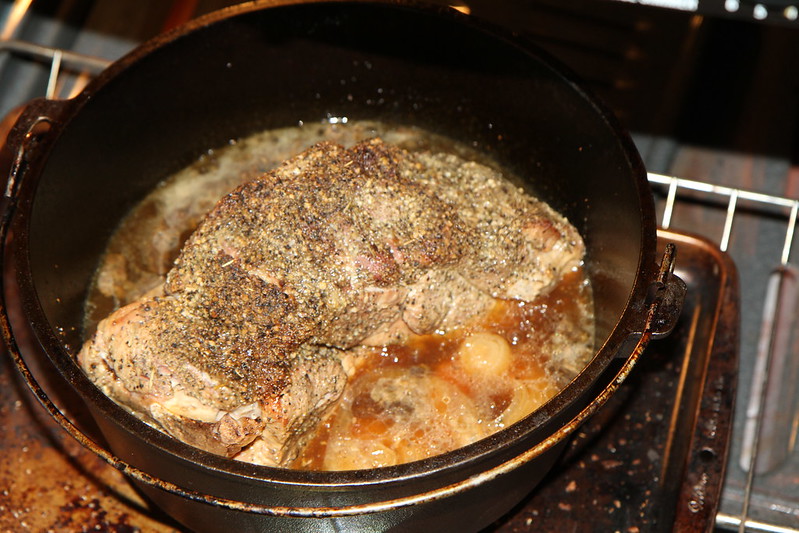
Dutch Oven Pulled Pork

An Eight pound Boston Butt Fridge to table in under 5 hours.


I love my pit but sometimes there's just not enough time to to fire up the pit and have dinner on the table in time.

I have done Picnics, Loins, Butts in a crock but it takes even longer in a crock pot than my pit, one nice thing about a crock pot is you can set it and forget it, so if you have time, you can pop a butt or picnic in your crock pot with some onion slices before you go to bed with no worries.

But what if you forgot about that butt and woke up the next morning an said shoot!, I forgot to throw the butt in the crock.
You had promised everyone pulled pork for dinner at 5:00 but its almost noon. You may be able to squeak it out in 8 hours if you toss it on the pit and run the temps 275°+ but then that means you will be eating at 8pm at the earliest.

Well that's exactly what happened to me this past weekend, we were running like crazy as we were running the Cub Scout Halloween party and when we got home after cleanup we were exhausted so we just went to bed.

So the next morning I woke up and figured I would do this Butt in the Dutch Oven.
  • Preheated the oven to 325°F

  • I Placed the dutch oven over the burner and heated it up and wiped liberally with Crisco.


  • Sliced a few onion for the bottom, you can use a wire rack (I don't because its just more to clean).
  • You want to keep the meat out of the liquid for the most part, in retrospect I should have used two onions and halved them instead of one onion sliced.

  • Placed the Butt on the onion slices.


  • I then poured some coca cola on the butt, (wanted to use a quality Root Beer but had none)


  • Seasoned the butt with my "Philly style" rub.

  • Added some brown sugar.


  • Placed the DO in the oven on a pan.


  • After about a half an hour, I turned the temp down from 325°F to 275°F.
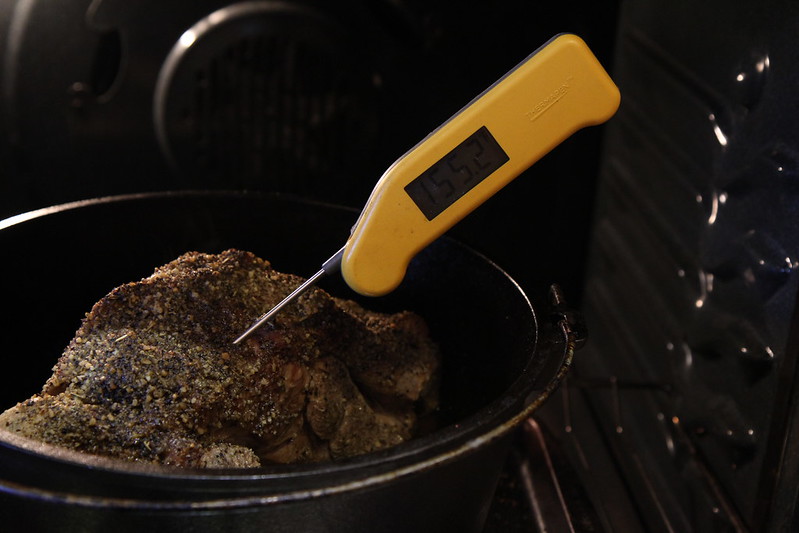
  • Checked the Internal temp at the three hour mark, 155°F internal.


  • Internal temp, 200°F - 205°F respectively. Ready to pull. I had to drop my daughter off and pick up my son and his friend, so I turned off the oven and left it in the oven.


  • OK I'm back approximately 30 minutes, removed DO from the oven and it's Ready to pull.


  • Removed the butt from the DO and placed in a steamer pan to fork shred.


  • Juices are strained and saved for another day, they will not be used for this cook.


  • Added some Sweet Baby Rays and some Cattleman BBQ Sauce to the pork.


  • What a wonderful meal, there was almost no cleanup from this cook, The DO cleaned up with a sponge and some hot water and was wiped down with some flax seed oil.


SQWIBB is offline   Reply With Quote
Old September 4, 2019   #32
SQWIBB
Tomatovillian™
 
Join Date: Jan 2018
Location: Philly 7A
Posts: 739
Default

August 1st, 2013

Ribeye, Parmesan Roasted Potatoes,
Asparagus and Garlic Bread


Who says you have to rough it when camping.

This was my son, Stephens first year at Boy Scouts Summer Camp, so I decided to tag along and help out, plus I'm the Official Unofficial photographer.

The meals were fairly good at camp, but then again I can eat anything.

A buddy of mine that has a son in the same troop decided to go as well so we prepared a bunch of meals and brought a 5 day cooler with the meals, hoping they would stay cold 5 - 6 days.

The cooler held up great, still had Ice on the seventh day (two days after we got home)


Here is one of our meals.


  • My new Camp Chef and Lodge Skillet, garlic bread on the right.


  • I really like the BTU Output of this camp chef, works great with cast iron.


  • Parmesan Roasted potatoes. These were made at home, vacuum sealed and refrigerated,we cooked them in the bag in boiling water then dumped them into a hot frying pan and tossed them until they browned even more.


  • Ribeye, Parmesan Roasted Potatoes, Garlic Bread, Asparagus and Coke

SQWIBB is offline   Reply With Quote
Old September 4, 2019   #33
SQWIBB
Tomatovillian™
 
Join Date: Jan 2018
Location: Philly 7A
Posts: 739
Default

December 30th, 2014
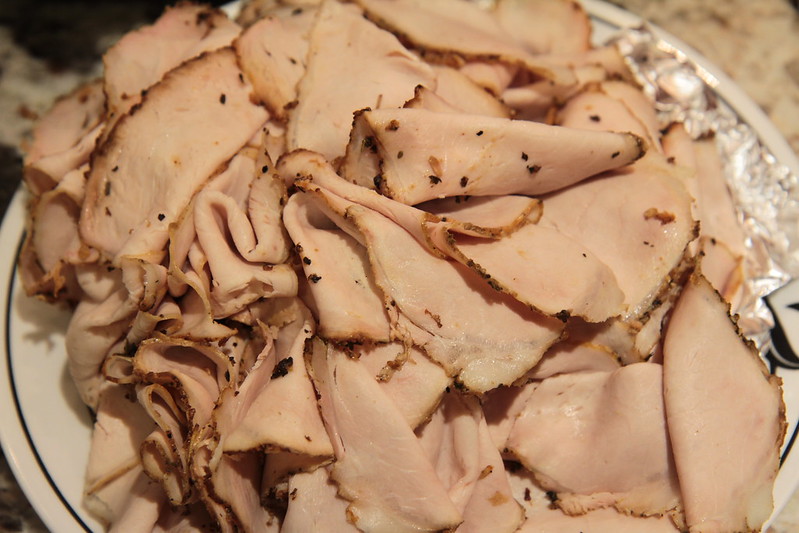
DO Roast Pork Sandwiches


For my Roast Pork Sandwiches, I usually brine the loin for 48 hours, rub with Montreal Steak Seasoning and cook on the pit until an internal temp of 138-140° foil, then the loin will rest overnight before slicing
.

I picked up a 10 pound loin and planned on three recipes in the crock pot, i made two of the recipes, Buffalo Style Pork Loin and Pineapple, Peach, Habanero pork loin. The third was going to have an Asian flair.

The wife says to me, what are you going to do with the rest of that loin, I told her my intentions and she said, "You should make Roast Pork Sandwiches for the New Years Eve Party tomorrow night".

I thought well it's too late for a brine, but figured it's going in gravy so no worries.

I said, "OK, I'll do it in the Dutch oven", she nods in agreement, then I said, "I'll hit it with my Philly Style Rub"... well she rolls her eyes and I'm like... WTF... I said you love that rub, and she says, "OK give it a shot".

I still don't know why she rolled here eyes!
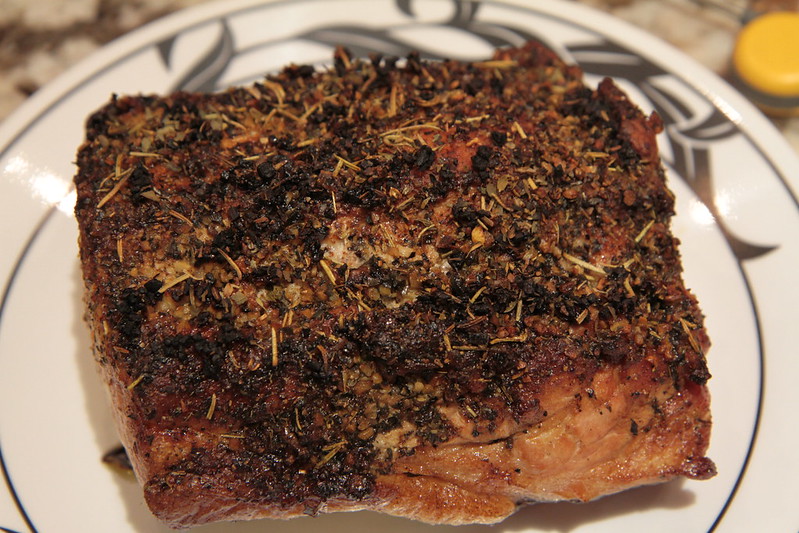


  • Oven set to 550° for 15 minutes.


  • Fat is scored (crosshatched) thin cuts. You need some fat so if you trim, leave a thin layer.


  • Browned all 6 sides, went high heat and heavy sear on the fat side.


  • The DO is Greased and a trivet is placed on the bottom then a layer of onions, onions are discarded after the cook.


  • Pork is coated in a butter, Soy 80%, Worcestershire 20% mix then coated heavily with my Philly Style Rub, extra crushed garlic is spread on top. 2 cups of water is added to the DO


  • Placed in the oven at 550° uncovered for 15 minutes, this was my first time doing a loin this way so I was shooting in the dark as far as time goes, after 15 minutes internal was about 110°? added 15 more minutes at 550°


  • Loin rests undisturbed in the oven for 2 hours, I did probe it real quick and got a reading of 155° I thought it was ruined. The Onion is discarded and drippings can be removed to tweak the gravy. The loin is place in the refrigerator uncovered, the next day the loin is removed and sliced paper thin.


  • Sampling the pork, the sliced loin was still moist and had great flavor, the meat wasn't as flavorful (less salty) tasting as my brined loins, so I would say that the brined is better for deli type sandwiches. The outside (Bark) was nothing short of amazing, I am real happy with this versatile rub.


  • 3 Jars of Heinz Beef gravy diluted to one jar of water, gravy is heated then crock is turned on warm and pork is added one slice at a time dunking each piece, folding the meat in the gravy makes serving much easier and makes for a much better sandwich. TIP: Place meat on roll then squeeze excess back into crock when serving.


  • These also make outstanding open face sandwiches.

The opinions were all the same, this was my best to date Roast Pork Sandwiches, I think it has to do with overcooking it slightly, all my loins almost never go over 145°, which is perfect for deli type cold pork sandwiches.
I gotta say that the texture is much better cooking at a higher internal temp if serving in a gravy. My daughter BF who doesn't like pork, couldn't get enough of this, he always says he don't like pork and I say your cooking it wrong.
I wasn't even going to document this cook, but the results were so good, I figured it would be a good idea to jot it down and compare to some more cooks.
SQWIBB is offline   Reply With Quote
Old September 4, 2019   #34
SQWIBB
Tomatovillian™
 
Join Date: Jan 2018
Location: Philly 7A
Posts: 739
Default

Meatzapalooza Chili


Got the hankering for some chili

Used my Lodge Cast Iron Dutch oven and Cast Iron skillet.

  • Oiled the Dutch Oven placed the DO on a burner Sauteed one large onion in some Olive oil on the skillet, slightly salted (sea salt) and cracked some fresh pepper, dumped them in the DO then started on the meats.
  • Started with some basic stewing meat browned, salt and pepper... into the DO
  • One Lb. Jimmy Dean hot sausage browned, drained and spiced with my pig rub... into the DO
  • Browned 80/20 ground meat salt and pepper... into the DO.
  • Crisped up a 1/2 lb bacon drained and ...into the DO
  • Had some rib bits simmering in hot water got about a half a pound of rib meat... into the DO
  • Two cans of Diced tomatoes... into the DO
  • Three chipotles chopped... into the DO
  • One Large Green pepper chopped... into the DO

Then the spices were added
  • Cumin
  • Coriander
  • Taco Seasoning
  • Chili Powder
  • crushed Garlic
  • Basil
  • Oregano
  • Sea Salt
  • Cracked Pepper
Then into the smoker for 6 hours or so,


I ladled off the grease during the smoke.

Chili is always a fun recipe and a good way to recycle some scraps and leftovers, I love making Gumbo, Chili, Soup and Stew on the smoker, gives me something to snack on throughout the smoke and the longer its in the smoker, the better!.
SQWIBB is offline   Reply With Quote
Old September 4, 2019   #35
SQWIBB
Tomatovillian™
 
Join Date: Jan 2018
Location: Philly 7A
Posts: 739
Default

OK, This is an extremely long post and is broken into sections because of the 30 image limit, hopefully you can get through it, lol.


January 31, 2014


SQWIBS Prime Rib


I finally got a chance to stop in at the new Restaurant Depot earlier this week.

I walked in and scanned my card and the gentleman at the desk said, "Excuse me sir, your card has expired"... my heart dropped.
My RD card is my most cherished possession, anyhow, he's fiddling with the computer but not saying anything and I'm thinking I'm screwed well after the longest two minutes of my life he says, "here you go". Wow, that was close.
Apparently your card will expire if not used in a certain amount of time.
Now I have an excuse to use it more often.


  • I could go nuts just shopping for cheese,


  • Tons of meat.


  • We picked up a 16 lb (Boneless Rib Eye) Prime Rib and invited Mom and Dad up for dinner, here's my little baby now.
(Proud Pa Pa)


  • I know... it's select not choice!


There are quite few methods for doing a (Boneless Rib Eye) Prime Rib.
I always panic when trying something new with a $100.00 piece of meat. I have tried several different methods before and all have been good, but one stood out as the best, this is the 2nd half that I cooked, shown later in this article.I wanted to get an understanding of how this meat cooks before I attempt smoking one. Many of the folks on this site whom I admire seem to be very happy with their results, (I wont mention any names as their too many to mention)
My fears have been set aside when it comes to this piece of meat and I am just as comfortable preparing this cut as I would something as simple as a Pork Loin.


  • I decided to do half of the Boneless Rib Eye, as I thought 16 lbs. was a tad big for the five of us.

  • OK, lets do this, Wiped down the DO with butter.

  • Chopped a large onion for the bottom.

  • Preheated the oven to 500°


  • Seasoned with Butter, Montreal steak seasoning, soy sauce and brown sugar, added a cup of water and ½ cup of vermouth to the DO.


  • Decided to add some carrots at the last minute.

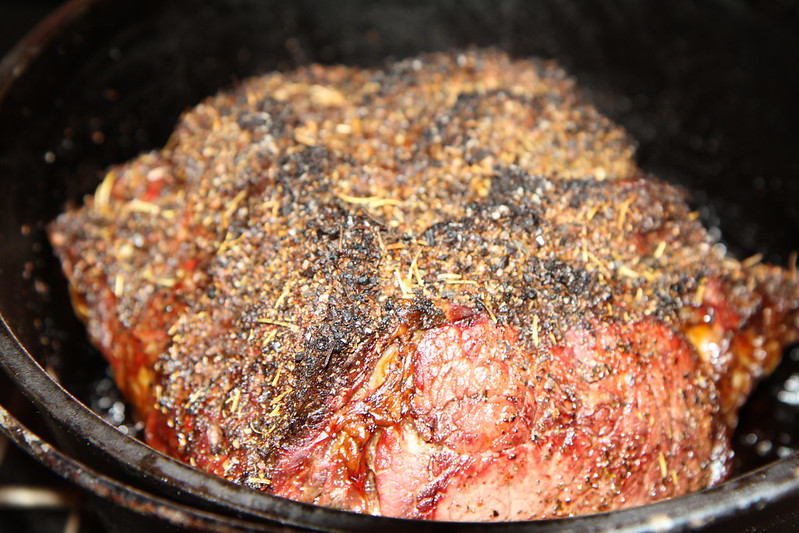
  • I cooked on high heat 500° for 25 minutes and finished off at 325° to an internal temp of 125°


  • The gravy was a bit too sweet from the first roast but tasted so close to french onion soup that I decided to play a little.


SQWIBB is offline   Reply With Quote
Old September 4, 2019   #36
SQWIBB
Tomatovillian™
 
Join Date: Jan 2018
Location: Philly 7A
Posts: 739
Default

SQWIBS Prime Rib Continued


Sunday as I was prepping everything for Dinner, I decided to play some more.
  • I decided to make croutons from some stale Philly Soft Pretzels.

  • Garlic Parmesan Croutons and Garlic Croutons.


OK back to the Boneless Rib Eye


  • The second half I left exposed on a rack in the refrigerator for 24 hours.


Preheated the oven to 550°
  • Then on the counter for two hours. (NO, 40° – 140° comments lol)


  • Trimmed some of the hard fat.


  • Wiped down the DO with butter.


  • Chopped a large onion for the bottom.


  • Warmed butter and Soy Sauce in the microwave.


  • Seasoned both sides of the meat with Butter and Soy Sauce.


  • Coated Liberally with Montreal steak seasoning and granulated garlic.

  • Added a cup of beef broth and ½ cup of vermouth to the DO.

Put the thermometer away
  • I cooked the Rib Eye on high heat 550° at five minutes per pound (40 minutes), turned off the heat and left in the oven undisturbed for two hours.


  • First slice.... this is a good sign.


  • Looking good! I am definitely a happy camper.


The meat is always outstanding but this last cook stood out, the meat had a more even doneness throughout.
It was also much easier to carve and the juice loss was minimal.
I just cant get over the flavor that this cut of meat has.

The gravy was outstanding!


  • Plating.
  • Prime rib w/Onion gravy,
  • Sweet potato w/brown sugar and butter,
  • Roasted Brussels sprouts w/balsamic vinegar,
  • Broccoli and cheese.
  • Prime Rib French Onion soup with garlic croutons


SQWIBB is offline   Reply With Quote
Old September 4, 2019   #37
SQWIBB
Tomatovillian™
 
Join Date: Jan 2018
Location: Philly 7A
Posts: 739
Default

SQWIBS Prime Rib Continued


This Prime rib has gone a long way, we had some more PR for dinner and snacks throughout the week I shaved some PR fried up some onions, tossed in some shaved meat and made an awesome cheese steak with fried onions and topped with pickles (no other condiments needed).


Yesterday I decided to slice the rest of the PR on the slicer and make some Prime Rib French Dippers.
Man... were these good, the meat was so dam tender.
The dippers are my favorite way of enjoying the prime rib.
The price of the meat pales in comparison to the value you get, factoring in how many meals this hunk of meat has provided.


  • I love my slicer, thanks Dave!


  • I cant stand fat, but I dare not trim the fat on thinly sliced Prime Rib.


  • Finely chopped onions, beef broth, Beef Bouillon, Montreal steak seasoning, garlic powder, onion powder, Vermouth and a splash of Worcestershire. Onions were cooked down with butter, all other ingredients were added, reduced by 10 percent, strained gravy.


  • Prepping the Sandwiches. Meat was sliced and set out for an hour, the meat was dipped in the hot gravy, allowed to drip, then placed on a roll and served Au Jus.


Hmmm still have some leftover, what shall I make


  • How about a Philly Cheese steak with fried onions and pickles


  • What an awesome lunch.
Pssst. ... I have a little secret, I used KETCHUP, yep I said KETCHUP, don't tell anyone.


Still more left
  • OK how about Steak and eggs for breakfast?


  • Eggs topped with, Montreal Steak seasoning and "SQWIBS Fire in the hole" hot sauce.


Dang these were freaking good!
SQWIBB is offline   Reply With Quote
Old September 4, 2019   #38
SQWIBB
Tomatovillian™
 
Join Date: Jan 2018
Location: Philly 7A
Posts: 739
Default

Christmas Prime Rib


Every year for the last several years, my brother Jim and I have been cooking beef for my moms traditional Christmas dinner at her house, since the family's appetites have grown so has the menu.

Jim usually does the Beef tenderloin and I do the prime rib.
I do the prime Rib at home and Jim does the Tenderloin at Moms... the way he does his loin and the way I do my Prime Rib, there's just no way to utilize the oven for both.

  • I refinished my Cutting board and picked up a Razor Sharp, Victorinox Fibrox 8-Inch Chef's Knife. I told Laura she was forbidden to use it, she could cut herself on a butter knife.


  • Picked up the PR From Restaurant depot at $7.38 a pound


  • I Halved the PR, well I actually went heavy to one side, the one side was thicker, the roast side was at 8 pounds.


  • The other half was cut into 15-20 oz. steaks.


  • I trimmed off some of the fat as it wont be needed on the steaks.


  • Then Vacuum sealed, labeled and frozen.


  • OK back to the Roast, all fat trimmings were chopped and reduced, the rendered fat (lard) is saved for another day.


  • Onion is chopped


  • Buttered Dutch Oven.


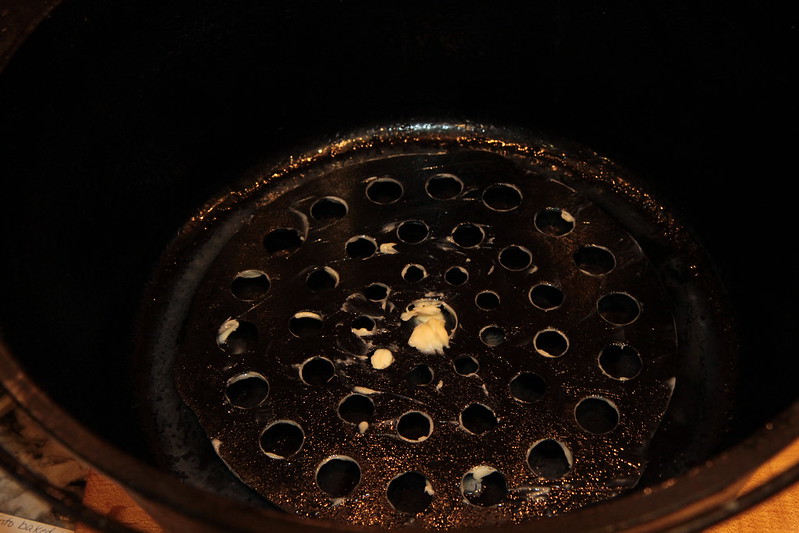
  • Trivet is buttered and placed in the bottom of the Dutch Oven.


  • Beef gravy is mixed from beef base and a stick of butter is melted in a cup of soy sauce, I added a 1/4 cup of Worcestershire this year.


  • Rendered beef bits are added, (this really adds flavor to the gravy)


  • Onions are added


  • Beef gravy is added about three cups, i only used 1-1/2 but I suggest 3 cups


  • A half cup of Knob Creek is added.


  • OOOPS, I mean 2 cups of knob creek is added.


  • Some trimmings are added for the stock


  • Prime Rib is added.


  • Soy, Worcestershire and Butter mix is poured over top of the roast.


  • Decided to use my Philly Style Rub this year in place of the Montreal Steak Seasoning.


  • Oven preheated to 550° and timer set to 40 minutes (5 minutes per pound)


  • After 40 minutes at 550° Roast will stay in the oven undisturbed two more hours


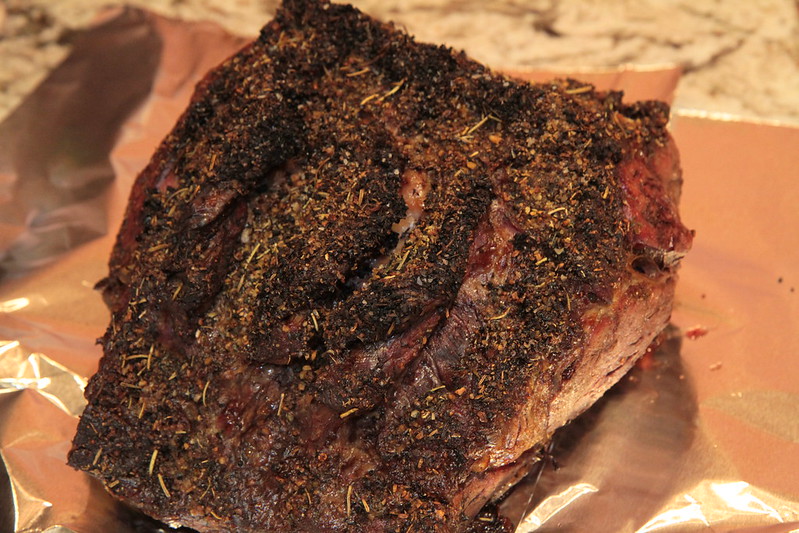
  • Roast is removed after 40 minutes cook time at 550° and 2 hour rest... I checked the temp of the oven when removing the roast and it was at 110°.
  • I could tell it was pretty rare inside because the way the meat jiggled around, but wasn't sure just how rare it was.
  • Gravy was drained, strained reheated and 2 cups of water were added for the Au Jus.


  • Foiled and left the top open so the bark would not soften too much. Bowl and towel on bottom of the cooler.


  • Foiled paper plate laid on top.

\

  • Towel on top, lid is placed on top and ready to be sliced in 2 hours.


  • Jim's Beef Tenderloins


The beef tenderloin was great but the first few outside cuts tasted gamey, Jim's gravy was awesome as well as the rest of the tenderloin. The prime rib was great but a little too rare in the center 1/3rd. Most of it went but it was a tad too rare for my family but not me. I think next years roast will be 6 minutes a pound instead of the 5 minutes per pound

The crust was freaking incredible and the gravy blew my mind... musta been all that Knob Creek...lol. I could have added more liquid to the DO as it pretty much cooked off.
SQWIBB is offline   Reply With Quote
Old September 4, 2019   #39
SQWIBB
Tomatovillian™
 
Join Date: Jan 2018
Location: Philly 7A
Posts: 739
Default

SQWIB Meets Bette Crocker "Apple Butter"


Nothing says "Fall", to me more than....

... Apple butter.

Need I say more?


Ingredients


  • 24-30 Granny Smith or other cooking apples, peeled and cut into fourths I used winesaps and Golden Delicious
  • 3 to 3-1/2 cups packed brown sugar
  • 1 cup apple juice
  • 2 tablespoon ground cinnamon
  • 2 tablespoon lemon juice
  • 2 teaspoon ground allspice (watch the allspice)
  • 2 teaspoon ground nutmeg
  • 1 teaspoon ground cloves
2 red jalapenos, for a split batch test.

Preparation

see step by step photos


  • All the ingredients ready to go.


  • I made sure to ask for some assistance from my daughter.


  • This apple corer slicer is awesome.


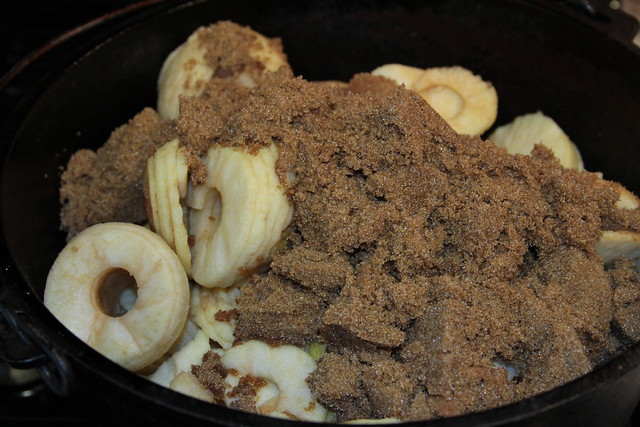
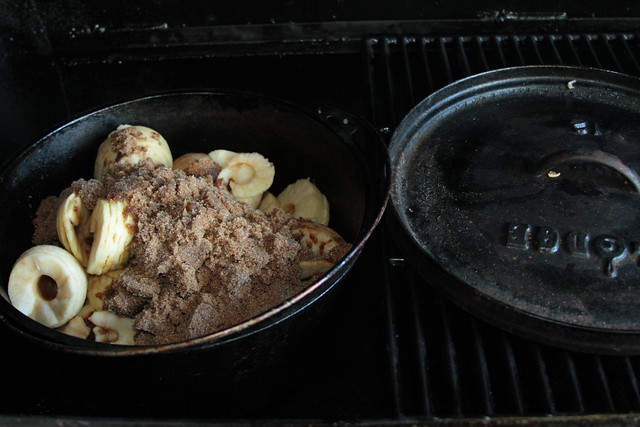
  • Here are all the dry ingredients measured out and ready for the Dutch Oven.


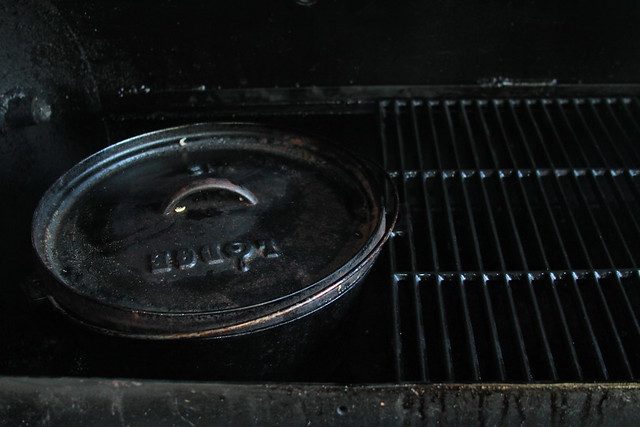
  • Ingredients are thrown on top including the apple juice and the lemon juice then placed in the reverse flow by 10:30 am


  • First stir after a few hours. It's amazing how good it smells already.


  • Several hours later.


  • A few more hours later.


  • Cheating with a mixer


  • Trying a batch with some red jalapenos, no seeds or veins.


  • 6:00 pm finished

  • Canned by 7:00pm. The rest will go in the refrigerator to munch on the next few weeks.


  • Apple butter on pork loin.

The last few days I have been eating the apple butter on everything.


  • Graham Crackers...


  • Homemade Apple pie...


  • Saltines with cream cheese...


  • Last but not least...Half Bagel with cream cheese and apple butterand half bagel with butter and apple butter...


Thoughts, I am an apple butter addict I LOVE going to local farms and purchasing their home made apple butter and figured this year I would make my own, I searched the internet and picked the first recipe I saw by Bette Crocker and figured I would add a twist by smoking the apple butter.
..aaah, just the smell of it cooking makes my mouth water, this was pretty good for my first time.


I think I may do two batches next time and not mix the apples, probably wine-saps and a batch of golden delicious or granny smiths.
The apple butter had a little kick to it which was nice.


I "canned" a few for Friends and Family in a hot bath and it should keep at room temperature for storage. The rest went into an empty apple sauce container.

After a 24 hour rest in the refrigerator it mellowed a bit so I tried a few tablespoons on wheat toast with butter and wheat toast with cream cheese, man... this stuff is simply amazing.

That's all I had for dinner last night was apple butter on toast.


I did not leave the lid off much to try and acquire some of the smoke flavor, because I was afraid of ruining the whole batch, you can barely smell any smoke flavor and can not taste the smoke at all, next batch I will leave the lid off for an hour or so halfway through the cook when it starts getting that soupy consistency.

The apple butter holds up well, it does not separate or get runny when it sits.


The jalapeno batch was awful, the problem was that the smaller dutch oven I had was a little oily inside and the oil flavor permeated into the apple butter, I had to toss it.
I probably would have kept it if I didn't have the original batch to compare it too!


Got the following Suggestion from Bassman on Smoked-Meat.com.
For another taste treat, try adding in a cup or so of red hots (cinnamon candy)


SQWIBB is offline   Reply With Quote
Old September 4, 2019   #40
SQWIBB
Tomatovillian™
 
Join Date: Jan 2018
Location: Philly 7A
Posts: 739
Default

I have been wanting to do a Sweet and Sour Rib cook for a long time and decided to give it a shot.

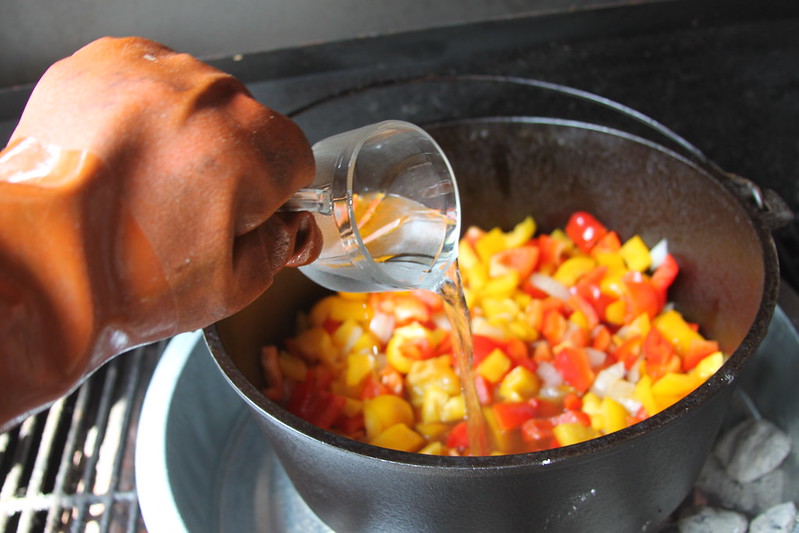
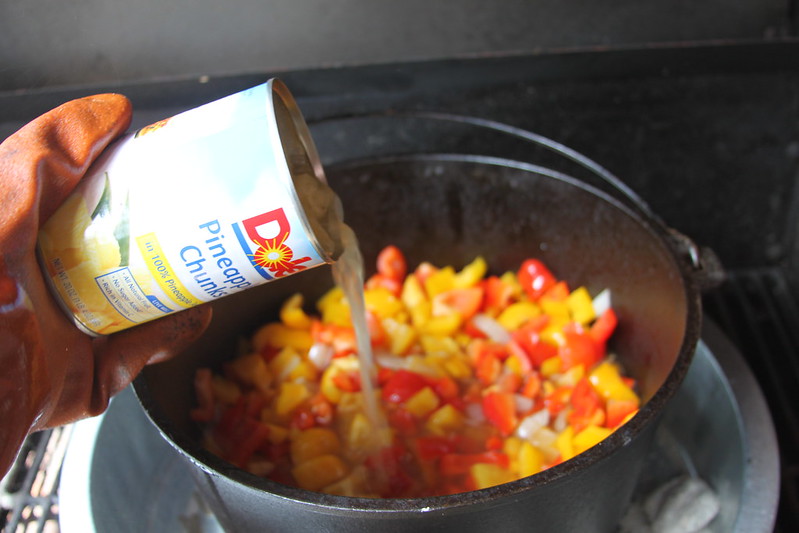
  • Starting the Dutch Oven for the "Sweet and Sour Ribs"

  • 2 yellow bell peppers chopped
  • 2 red bell peppers chopped
  • 1/2 cup of sliced Maraschino Cherries (Which I forgot)
  • 1 small onion chopped
  • 1 can pineapple chunks (reserve juice)
  • 1 cup orange juice
  • 1/4 cup lemon juice
  • 1/2 cup brown sugar
  • 1/2 cup Teriyaki sauce
  • 1/2 cup Vinegar
  • 1 can of Coca Cola
  • 1.5 Tbsp garlic salt
  • 1 Tbsp crushed red pepper


  • Flipped back, mopped several more times and tossed on a bunch of Jalapenos for dishes at a later date.


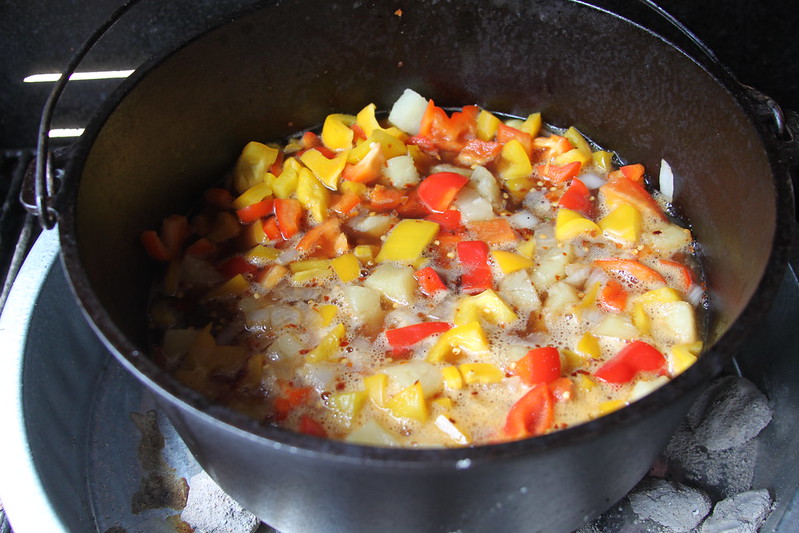
  • Oil is added


  • Onions are added and Sautéed until translucent


  • Peppers are added and Sautéed.


  • Liquids are added

  • 1 cup orange juice
  • 1/4 cup lemon juice
  • 1/2 cup brown sugar
  • 1/2 cup teriyaki sauce


  • one half cup of vinegar is added.


  • Pineapples are added.


  • A can of coke is added


  • Spices are added.


  • Simmer for two hours (gosh darnoodley, forgot to add a half cup of Marachino Cherries)


  • Two racks of Baby Back Ribs are removed from the smoker and halved. One half goes back into the smoker.


  • Ribs are placed in the Dutch Oven.


  • Cook for an additional hour on low heat.


Remove ribs from DO and thicken the sauce with corn starch.
SQWIBB is offline   Reply With Quote
Old September 4, 2019   #41
SQWIBB
Tomatovillian™
 
Join Date: Jan 2018
Location: Philly 7A
Posts: 739
Default

This is the heaviest Pizza I ever made, the post is in two parts, first the Fattie being made and smoked then the pizza.


Part 1 Supreme Pizza Fattie

WOW!! Its been 3 years since I made one of these.
I used ground beef for this, I think the sausage is a bit overpowering. This is actually a two stage project, the fattie needs to be cooked but will be used for a Priazzo type pizza.


Mix

  • 1 teaspoon Garlic powder
  • 1 teaspoon Oregano
  • 1 teaspoon Sweet Basil
  • 1 teaspoon Crushed Red Pepper
  • 1 teaspoon Salt
  • 2 tablespoons Grated Parmesan Cheese
  • 1 6 oz. can Tomato Paste
Cook

  • 1 Mild sausage, casing removed
  • Chopped Pepperoni slices
Chop

  • ½ green Pepper chopped
  • ¼ large chopped Onion
  • ¼ cup sliced Black Olives
  • ¼ cup chopped Mushrooms


  • 1 lb. Ground beef
  • 1 cup Mozzarella
  • Bacon


You can Make this the day before your cook.


Preparation
  1. Place ground beef in a 1 gallon Ziploc bag, roll out flat and place in refrigerator or freezer for firming, this will make it easier to remove from the Ziploc bag.
  2. Chop and cook pepperoni, set aside, chop and cook sausage of choice and set aside.
  3. Combine the first 7 ingredients and mix well, set aside.
  4. Chop onions and peppers
  5. Remove ground beef from refrigerator and cut along the sides (not the bottom) of the Ziploc bag.
  6. Spread the tomato paste mix onto the ground beef, followed by green peppers, onions, mushrooms, mild sausage, black olives, pepperoni then last but not least mozzarella.
  7. Roll sausage using Ziploc bag until completely sealed, roll off of Ziploc bag onto bacon weave and roll bacon weave using plastic wrap, wrap tightly in plastic wrap refrigerate overnight.(Do not roll this like a pinwheel.
  8. Cook at 250° till an internal temperature of 160°.
  9. Cool for 1 hour before slicing


  • Place a pan on a burner set for low and toss in some chopped pepperoni, while that is heating up mix your paste


  • Remove pepperoni and set aside, wipe out pan and toss in the sweet sausage (one link removed from casing). Set aside and wipe pan.
  • On a flat cool surface, layout some parchment paper and spray with cooking spray. Get out your ground meat and roll it out on top of the parchment paper. Look at the package, if you are lucky enough to get it packaged similar to the dimensions I did, you can slice the whole loaf in half and sort of butterfly it.
  • Try not to work the ground beef too much.


  • Trim the sides and toss the ground beef trimmings in the hot pan with a little SQWIBS Pork Rub.


  • While the ground meat is cooking, slice your veggies. Once the ground beef is done layout all your ingredients.

  • Veggies


  • Meats


  • Now lets build this thing! Start with the sauce and spread evenly, leave a little uncovered on each end where the loaf will connect.

  • Now its time for the bacon weave, lay down some parchment paper to build your bacon weave. once the bacon weave is made mush it down a bit to fill it in.


  • Ok the "Fun" easy stuff is done, time for the hard part. Push down on the stuffing mix, but not too hard where you have a blowout. Now start forming the log by rolling. Hold the parchment paper with one hand and tuck the filling in as you go with the other hand. This may take 5 minutes or so to form properly.


  • Once the log is rolled and the two ends meet, secure the ends together and tuck the stuffing in on the sides, you have to go by feel here.


  • Place the log on top of the bacon weave and center it, season the top with rub and tuck the parchment paper back and carefully roll the log onto the bacon weave trying to get the seam on the bottom.


  • Once on the log is on the bacon weave, season the other side and pull up the bacon weave ends, the bacon weave should be on parchment paper as well, this helps with forming the fattie, but as you can see, I did not do this. Now it is time to tighten it all up. Roll the log on some plastic wrap and wrap tightly. I had to do one wrap lengthwise and another along the width. Now grab the ends securely and roll the log by pushing it forward while holding the ends, this will tighten up the plastic wrap compressing the log together,


The next day


  • Supreme Pizza Fattie is tossed on the GOSM with Apple wood and with foil on the bottom until it firms up a bit.


  • Fattie is removed and will rest about an hour


Last edited by SQWIBB; September 4, 2019 at 11:35 AM.
SQWIBB is offline   Reply With Quote
Old September 4, 2019   #42
SQWIBB
Tomatovillian™
 
Join Date: Jan 2018
Location: Philly 7A
Posts: 739
Default


Part 2 Supreme Pizza Fattie


Going a step further with the fattie.


  • I picked up 5 large pizza dough balls from a pizza joint and will be using two for this monster. Dough is flipped, tossed and stretched, NOT ROLLED, and placed in a 17" skillet.


  • Sauced


  • Fattie is sliced, chopped and placed on the sauce.


  • Cheese.


  • The other dough ball is prepped.


  • The dough is placed on top, then the sides are pinched in. That little piece of pepperoni on the dough is not there by accident, my camera would not take a picture due to it seeing all white so I had to improvise.


  • Sauce, Cheese and then into the oven @ 375°.

I got a lot of flack when I brought this out, guys were busting my stones about making a pizza on MANDAY, I said it was a "Priazzo, it's stuffed with the Supreme Pizza Fattie", they called bull★★★★ and weren't interested. After I cut into it and the first guy had a piece, I couldn't slice it up quick enough.
SQWIBB is offline   Reply With Quote
Old September 4, 2019   #43
SQWIBB
Tomatovillian™
 
Join Date: Jan 2018
Location: Philly 7A
Posts: 739
Default

SQWIBB is offline   Reply With Quote
Old September 4, 2019   #44
Rajun Gardener
Tomatovillian™
 
Rajun Gardener's Avatar
 
Join Date: Jan 2014
Location: Tomato Cornhole
Posts: 2,550
Default

Nice cooks Sqwibb!

I have one skillet for eggs that's just like that. I had an egg & cheese omelette for breakfast with homemade blackberry jelly. Eggs taste better on cast iron or it seems that way to me.


__________________
Rob
Rajun Gardener is offline   Reply With Quote
Old September 4, 2019   #45
SQWIBB
Tomatovillian™
 
Join Date: Jan 2018
Location: Philly 7A
Posts: 739
Default

Rajun, I have to agree they do seem to taste better.
Awesome omelet.


Folks think I'm crazy when I say that hot dogs coming off of a hot dog roller are the best I have eaten.
I'll do dogs on the skillet too, a few tablespoons of water in the pan, roll the dogs around until the water evaporates and keep rolling the dogs, don't brown or blister just to slowly cook through..
SQWIBB is offline   Reply With Quote
Reply


Posting Rules
You may not post new threads
You may not post replies
You may not post attachments
You may not edit your posts

BB code is On
Smilies are On
[IMG] code is On
HTML code is Off

Forum Jump


All times are GMT -4. The time now is 12:33 AM.


★ Tomatoville® is a registered trademark of Commerce Holdings, LLC ★ All Content ©2022 Commerce Holdings, LLC ★