New to growing your own tomatoes? This is the forum to learn the successful techniques used by seasoned tomato growers. Questions are welcome, too.
|
 |
|
|
Thread Tools | Display Modes |
 April 26, 2014
|
#1 |
|
Tomatovillian
Join Date: Feb 2013
Location: Brantford, ON, Canada
Posts: 1,341
|
http://www.durgan.org/URL/?JYUWW Soil Block Molds. Purchased soil block mold from Lee Valley. Testing this device to determine if germination is better, and if easier to transplant in outdoor garden. Chose Pak Choy and Snow Peas for my test.
http://www.durgan.org/URL/?YAQUO 26 April 2014 Soil Block Mold Testing Snow peas were used to test my new soil block mold. The objective is to get the peas to sprout then place the soil mold in the outdoor garden. This prevents disturbing the roots, and the germinating environment can be controlled. The soil block was placed in a muffin mold to reduce breaking the block when handling. Soil used was my home made mixture. |

|

|
|
April 26, 2014
|
#2 |
|
Tomatovillian

Join Date: Dec 2013
Location: Jacksonville, Fl
Posts: 820
|
I have been using a soil blocker for years and would never start cucurbits any other way. once you get the hang of using it, it is so easy. I bought the micro blocker last year and have yet to make decent blocks with it. I tired several times before putting it on the shelf.
This year I started black cherry tomatoes in trays and some in soil blocks. The soil block ones were so much bigger and looked so healthy. I am going to try more for my fall tomato crop. |
|
|
|
|
April 26, 2014
|
#3 |
|
Tomatovillian
Join Date: Jun 2013
Location: ny
Posts: 1,219
|
Durgan, do you mind sharing your mixture recipe? I will be watching this to see how it works. I am so curious about soil blockers!
|
|
|
|
|
April 26, 2014
|
#4 | |
|
Tomatovillian
Join Date: Feb 2013
Location: Brantford, ON, Canada
Posts: 1,341
|
Quote:
http://www.durgan.org/URL/?BCJYP 31 May 2012 Seedling soil. It was a nice day and all the ingredients were available, so it was decided to make seedling soil for the 2013 season. The underlying nutrient soil was the compost heap. It was modified using some knowledge and information from previous subjective experience.Ingredients added to the basic underlying compost was, coconut coir, mason sand, some garden earth, wood chip shavings, a bit of urea. My mental process was this. Coconut coir for moisture retention. Mason sand to inhibit coagulating of the basic compost. Garden earth to supply a few microbes. Wood chips shavings for aeration.Urea to replenish any nitrogen lost as the wood chips compost or break down.The wood chips also are an indicator of how through the mixing is, since they are easily seen. The subjective quantities selected were mixed thoroughly on the compost pile using the Honda FG110G rototiller. The finished product was stored in 20 litre buckets and closed with lids tapped into place with a rubber hammer. A total quantity of about 540 litres was obtained for use in the 2013 season.Holes were drilled under the lid lip to allow air in. http://www.durgan.org/URL/?BDPWM 7 October 2010 Seedling Potting Mix Seedling potting mix is made using sand,compost, coconut fiber, bedding wood chips, bone meal, garden soil to add some microbes), and the ingredients are mixed thoroughly using the Honda FG110 small high speed rototiller. The amount of any ingredients is subjective and based on experience and appearance. Total quantity made was 250 liters, which should meet my requirements. This mixture will be used for starting seeds indoors beginning about March 2011. http://www.durgan.org/URL/?IEVCS 11 September 2013 Seedling Soil Seedling soil for the 2014 season.The underlying nutrient soil was the compost heap brought in this Spring supplied by the city. It was modified using some knowledge and information from previous subjective experience.Ingredients added to the basic underlying compost was, coconut coir, mason sand, some garden earth, wood chip shavings, a bit of fertilizer 10 10 10. My mental process was this. Coconut coir for moisture retention. Mason sand to inhibit coagulating of the basic compost. Garden earth to supply a few microbes. Wood chips shavings for aeration and to determine how well the products are mixed, since they are easily seen. The subjective quantities selected were mixed thoroughly on the compost pile using the Honda FG110G rototiller. The finished product was stored in 20 litre buckets and closed with lids tapped into place with a rubber hammer. A total quantity of about 400 litres was obtained. Holes were drilled under the lid lip to allow air in. |
|
|
|
|
|
April 27, 2014
|
#5 |
|
Tomatovillian
Join Date: Nov 2011
Location: Long Island NY
Posts: 1,992
|
Durgan,
I believe the blocks will fit right in to your very efficient methods. Consider the large single block as well. It works very well for tomatoes. Cukes too, as Kay wrote. They air prune and with no transplant shock tend to take off as soon as you get them planted. Jason Beam has good pricing and quite a few "how to" videos. http://www.pottingblocks.com/soil-blockers/ http://thesoilblocker.blogspot.com/ Kay, I have the micro 20, with a very fine mix it is actually the easiest to use. But it has to be very fine, no perlite, no large particles at all. I did abandon it this year though in favor of starting seed in DE. Made some big blocks yesterday to pot up the cukes. 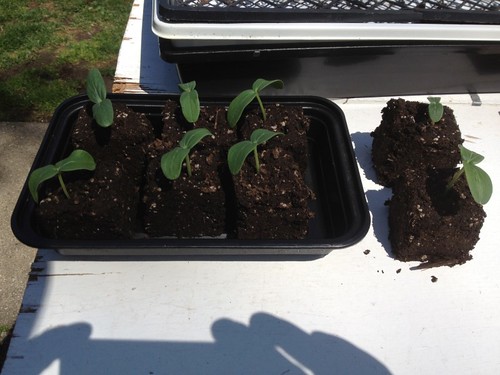 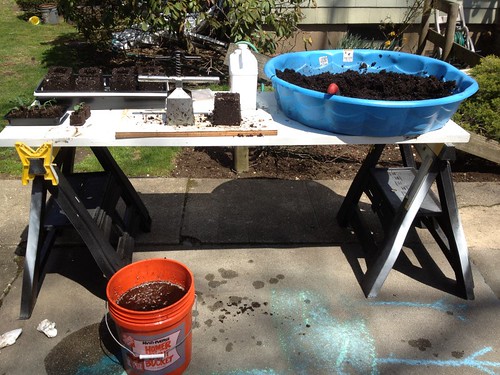 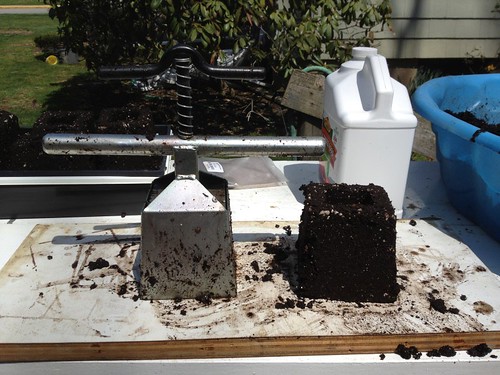 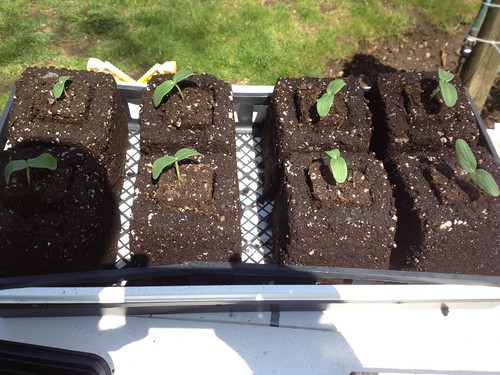 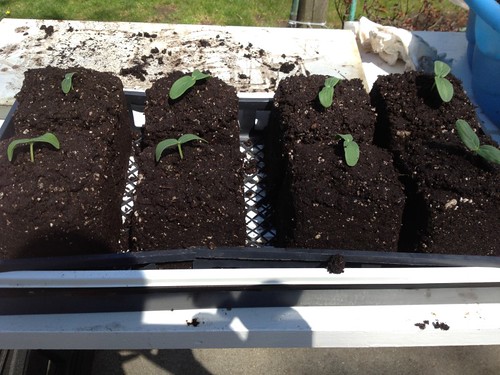 Cukes ready to go out last year. 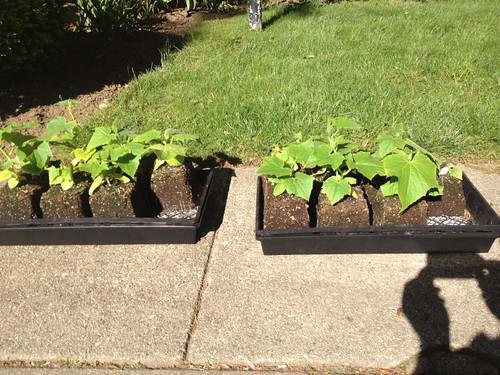 These Tom's will probably be in the blocks for another 2, possibly 3 weeks. 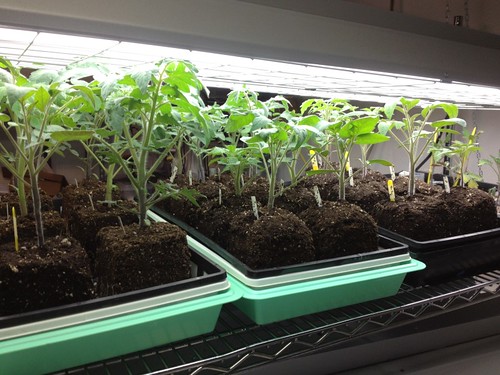
|
|
|
|
|
April 27, 2014
|
#6 |
|
Tomatovillian
Join Date: Dec 2013
Location: Jacksonville, Fl
Posts: 820
|
I do have some Fafard's germinating mix that is very fine with no perlite. I will give it another try using that. I can't stand to fail at something that should be easy to do.
|
|
|
|
|
April 27, 2014
|
#7 | |
|
Tomatovillian

Join Date: Jul 2009
Location: Ontario, Canada
Posts: 692
|
Quote:
I must admit I didn't get very good germination, mainly because they dried out too quickly, so using a spritzer frequently is vital for good germination numbers. |
|
|
|
|
|
June 7, 2014
|
#8 |
|
Tomatovillian
Join Date: Mar 2011
Location: Montana
Posts: 11
|
I have all of the soil blockers or at least smaller hand operated ones. I use them for just about every thing. There are lots of good recipes on the web and in Eliot Coleman's books. I think I would pass on the cup cake wrappers. I use a spatula. Some of the short fall are, if you get leggy seedlings when you move up to the next block size you can not bury them deeper in a lager block versus a container which I would say is the biggest short fall. It is possible to compact the blocks so tight the roots do not spreed well. More so in the micro blocker with tiny seeds (petunia ,pansys) and using coconut coir. If you water directly on the blocks they can come apart if they do not have roots through out. If you get the blocks too close the roots do not air prune, also in the solid bottom trays usually enough soil and water occur the roots spread easily. For the micro blockers and smaller seed I would not add compost or lots of nutrients. You have to watch the moisture, they can dry out quickly. I like to use a paper towel and a container that has recessed area where the blocks are not sitting in waterbut can still wick. The 4 inch block to me seems like an over kill, you get fantastic plants but it takes lots of soil and I usually transplant to the garden before hand out of the 2 inch. PRO-MIX HP MYCORRHIZAE is an excellent product to use in block making. The soil blocks really shine in starting plants in for square foot gardens, lettuce seems to do awesome in the micro blocker. You can start just about anything from corn, beans,peas, and melon, cucs and squash, all with little transplant shock. You keep fewer pots around for transplanting, although you can use paper pots too. They are a little expensive, the 4 inch was way too much in my opinion for the use I get out of it. The overall quality at least for the Ladbrooke brand, which are made in England is good I have not had any problems. You can start lots of plants in a small space or 20 in a very small space. In my opinion it is the best way I have found to start plants to fill in as summer progresses. As my spinach and lettuce goes to seed or gets eaten I have nice plants to fill in. Well that is what I have found with soil blocks, hope this helps someone out.
|
|
|
|
|
June 7, 2014
|
#9 |
|
Tomatovillian
Join Date: Dec 2013
Location: Jacksonville, Fl
Posts: 820
|
Thanks for posting such detailed information. I just realized after reading this I have been putting my 2 inch blocks too close together trying to fit more in the trays. I did finally master using the micro blocker after I changed the soil mix but ended up going back to the 2 inch. That seems like the perfect size since the seedlings can stay there until plant out.
|
|
|
|
|
June 7, 2014
|
#10 |
|
Tomatovillian

Join Date: Jan 2012
Location: NorthWest
Posts: 267
|
I have all of them too. And, I like them all for different things. And, I use them differently for different things. I only use the small one for very small seeds up to and including tomatoes. However, I will then pot up the germinated tomatoes into regular pots to be able to cover them with more soil. Most other seeds I would add then to the 2 inch blocks. things like peas can go into the mini 5 with the long dowels and work very well like that. Things like squash and bigger go into the mini 4 with the long dowels divots. If I know I won't be around to watch them, I will pot the herbs and cole crops up into standard cells. That way I get the benefits of both. Healthy young seedlings and a full container of cells that have no bare cells or undesirable sprouts. I use standard soiless seed starting mix for the small cubes and sometimes add things like rock dust powder and I do like to make my own mix or at least add long stranded sphagnum moss to my soiless medium and worm compost to make the larger blocks. The only one I wouldn't buy again would be the 4inch blocker, as it takes so much soil and I rarely use it and it was very expensive. Lorri D.
Last edited by Lorri D; June 7, 2014 at 08:02 AM. Reason: added more |
|
|
|
|
|
|


 View Public Profile
 Visit Durgan's homepage!
 Find More Posts by Durgan
 Linear Mode

