Member discussion regarding the methods, varieties and merits of growing tomatoes.
|
 |
|
|
Thread Tools | Display Modes |
 June 2, 2020
|
#16 |
|
Tomatovillian
Join Date: Jan 2018
Location: Philly 7A
Posts: 739
|
I finally started work on my Irrigation page on my website, it is far from done but for now, here is a copy/paste of what I have so far, hope this helps.
Ill probably post a new thread with more information so I can update, when I do that I'll post a link here. Drip Depot Orbit 58910 Programmable Hose Faucet Timer, 2 Outlet, Green  Lee Valley 'Y" shut off valve 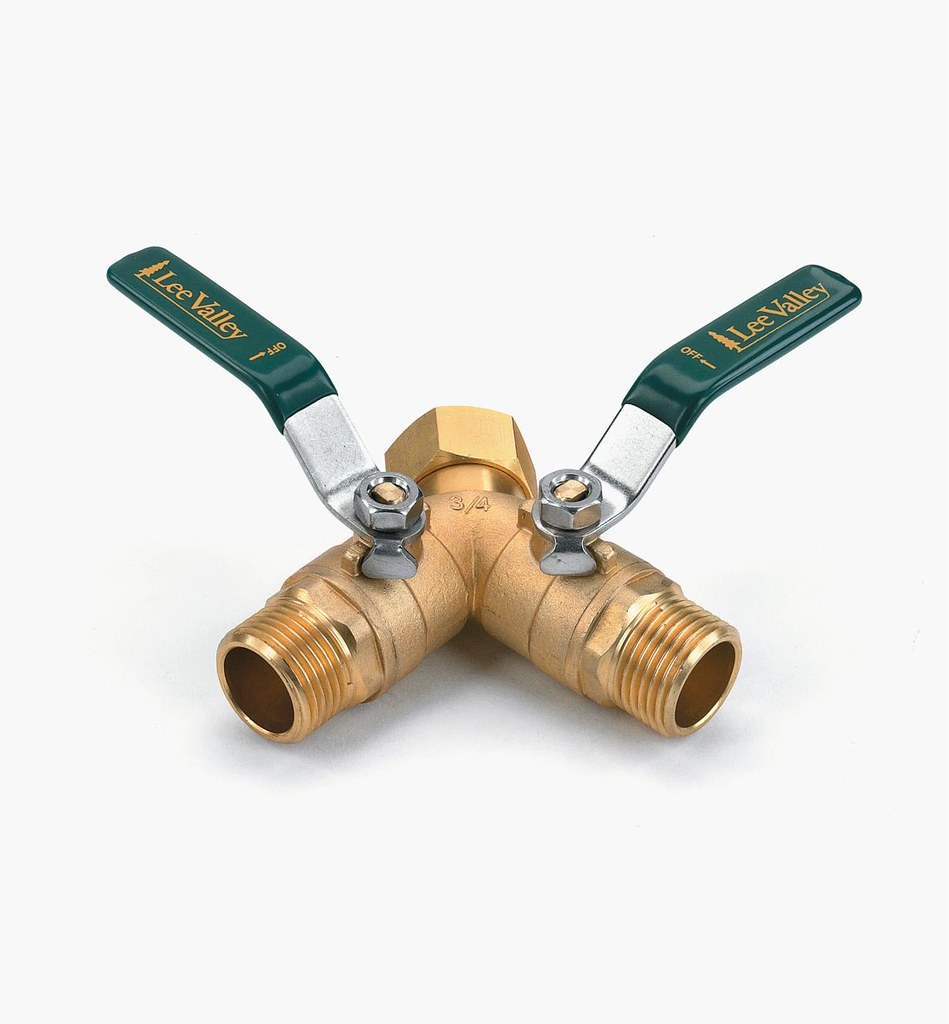 Valterra RV Hi-Flow Water Regulator 50-55 psi    This is the main 1/2" polyethylene tubing feed line.   Each bed has a double length of 12" spaced 1/2 gph line installed. with a valve so each bed can be shut off individualy..  Each bed has a 1/4" Barb Tubing Coupling Valve, so each bed can be shut off individually.  A 1/4" polyethylene tubing line goes to this mini raised bed with a section of polyethylene dripper line that is also on a 1/4" Barb Tubing Coupling Valve.  The main 1/2" polyethylene tubing line runs across the length of both beds on the hill and under the retaining wall to feed a 30' emitter line up on the retaining wall.  Looking at the picture above, the feed line then goes to the left and down to the lower beds and runs another 50' the entire depth of the yard. The main 1/2" polyethylene line has a low point with a perma-loc coupling for winterizing, I just disconnect the hose and wrap cloth around the hose with electrical tape, I will eventually just put a three way perma-loc with a valve for winterizing. Right where the rain barrel is there is 1/4" polyethylene tubing that goes to the deck post to feed the deck.  The 1/4" vinyl tubing runs off of the 1/4" Barb Tubing Coupling Valves that feed the pots on the deck, the . I used vinyl tubing in some applications because it is much more flexible.  Around this cherry tree is a 3 emitter loop made by a section of emitter line and a 1/4" Barb Tubing Tee.  This pot has an adjustable dripper.   This hanging pot has an adjustable dripper attached to a 1/4" Barb Tubing Coupling Valve   Directly under the hanging pot is another pot with a looped emitter made with emitter hose and 1/4" Barb Tubing Tee and a 1/4" Barb Tubing Coupling Valve.  From the end of the 1/2" polyethylene main line is a 1/4" polyethylene tubing that goes under the pavers to feed the pot in the next picture.  This pot has a 1/4" Barb Tubing Coupling Valve and a 1/2 gph compensating dripper, I may change this to a loop setup.  Front Yard Installing 1/2" polyethylene tubing line for front yard.   |

|

|
|
June 2, 2020
|
#17 |
|
Tomatovillian
Join Date: May 2006
Location: Glendora, CA
Posts: 167
|
Your water supply can greatly affect the soaker hoses. If you have 'hard' water, lots of calcium chloride, they can get clogged up with that stuff. Had soaker hoses and my hard water clogged them up in a year.
__________________
"We have met the enemy and he is us" - Pogo |
|
|
|
|
June 2, 2020
|
#18 | |
|
Tomatovillian
Join Date: Aug 2007
Location: Victoria. Australia
Posts: 543
|
Quote:
What I do is to dig the hole for the plant, making it deep enough for the pre-cut length of pipe (50cm), place the pipe and half fill the hole, then plant seedling. As the roots grow, they actively seek the water in the pipe or where it seeps out through the holes. Using this system you can hook up an auto system with drippers and have the drippers in the pipe itself. You'll use less water putting it where it's needed, than flooding the soil from above. Something to think about, no matter what system you use above ground. |
|
|
|
|
|
June 3, 2020
|
#19 |
|
Tomatovillian

Join Date: Aug 2012
Location: Suburban Washington, DC (Zone 7A)
Posts: 347
|
Thanks I really like this idea. Can you link me to what the pipe is that you use? If I wanted to seek it out, maybe next year, what exactly I would be looking for.
|
|
|
|
|
June 3, 2020
|
#20 |
|
Tomatovillian

Join Date: Dec 2008
Location: Reading, Pennsylvania
Posts: 48
|
I have heavy clay here too that is mixed with rock. I mixed in some compost and peat humus (not moss) into the soil. It made a world of difference in the structure and drainage. After that I mulched with compost in the Spring and chopped leaves in the fall. It went from being a brick when it was dry outside, to being able to dig it with just a small hand trowel or my bare hands.
|
|
|
|
|
June 4, 2020
|
#21 |
|
Tomatovillian
Join Date: Mar 2012
Location: Allentown, PA
Posts: 349
|
I also use Drip Depot. I highly recommend choosing one supplier and sticking with them. I have found that not all 1/2" and 1/4" tubing and fittings are the exact same size.
I run a 1/2" main line from the hose bib on the house to my raised beds (including an underground section that I trenched out a few inches). The main line branches off and runs up the top of each bed, with a shutoff. From there, I run a 1/4" drip line (one line per foot, 6" emitter spacing) across the bed. I also have a main line branch serving some pots on my patio. For those, I use an adjustable emitter.   Sent from my ONEPLUS A5000 using Tapatalk |
|
|
|
|
June 6, 2020
|
#22 | |
|
Tomatovillian

Join Date: Oct 2008
Location: Raleigh, NC
Posts: 97
|
Quote:
I've used other watering timers, none of them are half as good or last half as long as the Orbits like SQWIBB posted. I use the single and the triple outlet models. |
|
|
|
|
|
June 7, 2020
|
#23 | |
|
Tomatovillian

Join Date: Oct 2012
Location: Orlando, FL
Posts: 614
|
Quote:
|
|
|
|
|
|
June 7, 2020
|
#24 |
|
Tomatovillian
Join Date: Feb 2018
Location: So Cal
Posts: 380
|
Dip the tubing in a cup of Hot water, makes it a lot easier
|
|
|
|
|
June 7, 2020
|
#25 |
|
Tomatovillian
Join Date: Aug 2007
Location: Victoria. Australia
Posts: 543
|
You are going to need a lot of water to get down to the roots of a tomato plant, no matter what drip system you use.
|
|
|
|
|
June 7, 2020
|
#26 | |
|
Tomatovillian
Join Date: Oct 2012
Location: Orlando, FL
Posts: 614
|
Quote:
The only thing from DIG I think are utter crap so far are the little plastic stakes for the 1/4 emitters. Reviews said so, so I didnt order more than came with the kit. Just going to use more of the galvanized wire u-shaped stakes to hold everything... and maybe some improvised wire bits. |
|
|
|
|
|
June 8, 2020
|
#27 |
|
Tomatovillian
Join Date: Aug 2012
Location: Suburban Washington, DC (Zone 7A)
Posts: 347
|
Well I found that CaliKim video and actually seeing how it was installed makes it seem not so intimidating.
I basically have my tomatoes along 3 rows of maybe, I don't know, 25-30 feet long each. I think I would just run those little drip lines out and wrap them in a circle around each plant, if I were going to do it. My only question is I'm not going to be sinking a pvc pipe underground special just to feed that system, which means I would have to just run the system straight out from my outside faucet. Which I can do - but I worry about my yard guy destroying the hoses in the grass before it gets to the beds. I guess I could wrap them in bright red duct tape or something... |
|
|
|
|
June 8, 2020
|
#28 | |
|
Tomatovillian
Join Date: May 2007
Location: North County, San Diego
Posts: 418
|
You could protect surface lines by running them inside pvc electric conduit available at home improvement centers.
Quote:
|
|
|
|
|
|
June 8, 2020
|
#29 |
|
Tomatovillian
Join Date: Feb 2018
Location: So Cal
Posts: 380
|
Spray paint the pvc pipe green and it will blend in to the grass
|
|
|
|
|
June 10, 2020
|
#30 |
|
Tomatovillian

Join Date: Jan 2018
Location: Maine, 4b
Posts: 73
|
This is how I water. I too use Drip Depot for all my tubing/fitting needs. I have the timer shown in previous post that I use to fill the tub with water. From there I gravity feed into the RGGS.
__________________
Ken Last edited by asaump; June 10, 2020 at 02:07 PM. |
|
|
|
|
| Thread Tools | |
| Display Modes | |
|
|


 View Public Profile
 Find More Posts by SQWIBB
 Visit mike5953's homepage!

 Linear Mode

